
The Complete Guide to Shaker Cabinet Crown Molding and Decorative Trim Options
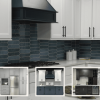
The best crown molding for Shaker cabinets is a simple one: a flat, square-edged crown or a small cove that repeats the clean lines of the Shaker frame. Ornate, deeply carved crown fights the style. Add matching light rail under the wall cabinets, scribe molding against the ceiling or walls and a finished toe kick, all in the same finish as the doors, and the cabinets read as built-in.
Planning a cabinet project in Chicagoland? CCC Cabinets is a wholesale-only supplier — browse the 15 in-stock door styles or open a trade account for wholesale pricing.
Key takeaways
- Match the trim to the door: flat or stepped crown for Shaker, cove for transitional, larger profiled crown for traditional raised-panel doors.
- Crown is optional. Shaker cabinets without crown look modern, especially when wall cabinets run close to the ceiling or stop at a clean, consistent line.
- On full-overlay cabinets, crown usually needs a riser or starter strip on top of the face frame so doors can open without hitting the molding.
- Order crown, light rail, scribe and toe kick in the same door style and finish as the cabinets so the color matches exactly.
What Are Shaker Cabinets?
Shaker cabinets have a five-piece door: a flat, square frame around a recessed flat center panel, with no decorative molding on the door itself. Because the door is so plain, the trim around the cabinets carries much of the style. The same Shaker door can look modern with no crown and slim light rail, or traditional with a stepped crown and a furniture-style toe kick. CCC Cabinets stocks several Shaker styles; see them on our cabinets page.
The Importance of Crown Molding
Crown molding finishes the top of the wall cabinets and connects them to the ceiling or soffit. It does several practical jobs:
- Finishes the top edge: crown hides the raw top of the cabinet box and the gap between cabinets and ceiling.
- Handles uneven ceilings: combined with scribe molding, it covers the varying gap where a ceiling is not level, which is common in older Chicago homes.
- Sets the style: a flat crown keeps Shaker cabinets modern; a stepped or cove crown makes them transitional; a large profiled crown makes them traditional.
- Draws the eye up: a continuous crown line across the wall cabinets makes the room feel taller.
Types of Crown Molding for Shaker Cabinets
Choose the profile by the look you want and the door style below it.
| Crown profile | Look | Best with |
|---|---|---|
| Flat (square) crown | Clean, modern, matches the Shaker frame | Shaker and mini Shaker doors in contemporary and transitional kitchens |
| Stepped or layered flat crown | More presence, still simple | Shaker doors under taller ceilings |
| Small cove crown | Soft, transitional | Shaker doors in classic or farmhouse kitchens |
| Large profiled crown | Formal, traditional | Raised-panel doors rather than Shaker |
| No crown | Minimal, modern | Cabinets that run to the ceiling or stop at a clean line |
1. Flat Crown Molding
Flat crown is a square-edged board, sometimes with a small step, mounted on top of the cabinets. It repeats the square lines of the Shaker frame and is the most common choice for Shaker kitchens today.
2. Cove Crown Molding
A cove has a simple concave curve. It softens the top of the cabinets without adding detail, which suits transitional and farmhouse kitchens.
3. Traditional Crown Molding
Larger crowns with multiple curves and details belong with traditional raised-panel doors. On plain Shaker doors they can look heavy and out of place. If you want a traditional look, consider a raised-panel door style instead.
4. Built-up Crown
Under tall ceilings, installers often stack a flat riser, a crown and a small cap to fill more height. Keep each piece simple so the build-up still matches the Shaker door.
Shaker cabinets without crown molding
Skipping crown is a valid design choice, not a shortcut. It works best when:
- The wall cabinets run close to the ceiling and a simple scribe strip closes the remaining gap.
- The kitchen is modern and the clean top edge is part of the look.
- The ceiling is low and crown would crowd the space.
Without crown, the cabinet tops need to be straight, level and finished, and any gap to the ceiling should be either closed with scribe molding or left deliberately open and even across the run. An uneven open gap looks unfinished.
Decorative Trim Options
Crown is only one of the trim pieces that finish a Shaker kitchen:
1. Light Rail (Under-Cabinet Trim)
Light rail mounts under the wall cabinets. It hides under-cabinet lighting fixtures and wiring from view when you are seated or standing at the counter, and gives the bottom of the cabinets a finished edge. For Shaker, choose a flat or slightly stepped light rail. Our guide to valance and light rail molding covers profiles and installation in detail.
2. Scribe Molding
Scribe is a thin, flexible strip used to close small gaps where cabinets meet an uneven wall or ceiling. It is cut or planed to follow the surface and is one of the most important pieces in older homes.
3. Toe Kick
The toe kick is the recessed panel at the bottom of base cabinets. A finished toe kick in the cabinet color gives a clean base line. Our guide to toe kicks and base details explains the options.
4. End Panels and Outside Corner Molding
Finished end panels cover exposed cabinet sides at the ends of runs and on islands. Outside corner molding finishes the joint where an end panel meets the cabinet face.
5. Valances
A valance spans the gap between two wall cabinets, usually over a sink window. For Shaker kitchens, a straight valance looks cleaner than an arched or scalloped one.
Installation Tips for Crown Molding and Trim
- Plan door clearance. On full-overlay cabinets, the doors cover nearly all of the face frame. Install a riser or starter strip on top of the face frame so the crown sits above the door swing.
- Level the cabinet tops first. Crown follows the cabinet tops; if the wall cabinets are not level, the crown line will show it.
- Add nailers where needed. Attach a nailing strip to the cabinet tops so crown is fastened to solid material, not just to the thin top edge of the box.
- Cut with a miter saw and cope where practical. Test outside and inside corners on scrap pieces first.
- Fasten with glue and pin nails. Glue the miter joints so they stay closed, and use small pin nails to keep holes tiny.
- Scribe to the ceiling. Where the ceiling is not level, use scribe molding above the crown rather than forcing the crown to follow the ceiling.
- Finish carefully. Fill pin holes with a color-matched filler. Use caulk only where trim meets painted walls or ceilings, not on factory-finished joints.
Planning crown height with your ceiling
The space above the wall cabinets decides how much crown you need. Standard layout puts the bottom of the wall cabinets about 18 inches above a 36-inch counter, so they start roughly 54 inches off the floor. From there:
- Under an 8-foot ceiling, 42-inch wall cabinets reach roughly to the ceiling, leaving room only for scribe molding or a very small crown.
- With 30- or 36-inch wall cabinets under an 8-foot ceiling, there is a gap to fill with crown, a riser and crown, or a soffit.
- Under 9-foot and taller ceilings, builders often stack wall cabinets, add a riser under the crown, or let crown and a soffit close the gap.
Measure the ceiling at several points along each wall before choosing wall cabinet heights; older ceilings are rarely level.
Maintenance and Care for Crown Molding
- Dust regularly: the top of the cabinets collects dust and grease, especially near the range.
- Clean gently: wipe with a soft cloth, mild detergent and warm water, then dry. Avoid silicone or wax products.
- Touch up early: repair chips in painted trim before they spread.
- Re-check joints: seasonal humidity changes can open small gaps at miters; a little color-matched filler closes them.
Expert Insights on Choosing the Right Trim
Keep the trim in the same family as the door. Flat Shaker doors look best with flat or lightly stepped trim; save detailed crown for raised-panel doors. Order all trim in the same door style and finish as the cabinets, and from the same order, so color and sheen match. A contrasting trim color can work on an island, but on the perimeter matching trim creates the cleanest look.
Trim for CCC Shaker cabinets
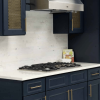
CCC Cabinets stocks Shaker door styles in painted and stained finishes, including Pure White, Light Grey, Shaker Blue (deep navy), Black Roast, Matcha Latte, Cappuccino Shaker and Espresso Shaker, plus Mini White Shaker with a narrower frame. All are full-overlay doors on a 3/4″ birch face frame, so plan a riser under any crown. When you build the box list, include crown, light rail, scribe and toe kick in the same style, and ask our team which trim pieces are available for your door style. Trade customers can open an account for project pricing.
FAQs
What is the best crown molding for Shaker cabinets?
A flat, square-edged crown or a simple stepped crown is the best match for most Shaker cabinets, because it repeats the clean lines of the Shaker frame. A small cove crown works for a softer, transitional look. Large, detailed crown molding usually suits traditional raised-panel doors better than plain Shaker doors.
Do Shaker cabinets need crown molding?
No. Shaker cabinets without crown molding look clean and modern, especially when the wall cabinets run close to the ceiling. The cabinet tops must be level and finished, and any gap to the ceiling should be closed with scribe molding or kept even across the run. Crown adds a more finished, traditional look.
How do you install crown molding on full-overlay cabinets?
Because full-overlay doors cover nearly the whole face frame, install a riser or starter strip on top of the face frame first, so the crown sits above the door swing. Add nailers on the cabinet tops, cut miters on a miter saw, glue the joints and fasten with pin nails. Scribe to an uneven ceiling.
What is light rail molding on Shaker cabinets?
Light rail is trim mounted under the wall cabinets. It hides under-cabinet lighting fixtures and wiring and gives the bottom edge of the cabinets a finished look. For Shaker kitchens, choose a flat or lightly stepped light rail in the same finish as the doors so it reads as part of the cabinet.
Should crown molding match the cabinets or the ceiling?
On cabinets, crown should match the cabinets: same door style finish, ordered with the cabinets, so color and sheen are identical. Room crown molding where walls meet the ceiling is separate and usually matches the wall trim. Where cabinet crown meets the ceiling, use scribe molding in the cabinet finish.
How do you compare crown molding for Shaker vs. traditional cabinets?
Shaker cabinets pair with flat, stepped or small cove crown that keeps the clean, square look of the doors. Traditional raised-panel cabinets pair with larger, more detailed profiles with several curves. Using traditional crown on Shaker doors tends to look heavy, while flat crown on raised panels can look unfinished.
Conclusion
Crown molding and trim decide whether Shaker cabinets look modern, transitional or traditional. Keep the profiles simple, plan door clearance and ceiling height before ordering, and order every trim piece in the same finish as the doors. To see Shaker styles in person, visit the CCC Cabinets showroom at 2180 S Wolf Rd, Des Plaines, or call (872) 241-5525. Browse every style on our cabinets page.
More in Cabinet Design
Sourcing cabinets for a Chicagoland project?
CCC Cabinets supplies 15 door styles — including Mini White Shaker cabinets — at wholesale prices from our Des Plaines, IL warehouse. Confirm availability for your door style, then choose warehouse pickup near O’Hare or scheduled delivery across Chicagoland.
Door styles to explore: Mini White Shaker · Pure White · Shaker Blue
Browse all cabinet styles · Open a dealer account · Call (872) 241-5525 · Talk to our team